
 Deutsch
 한국어

A stepper motor driver gives electrical pulses to the stepper motor. Each pulse makes the motor move in small, stepper motor driver changes weak digital signals into strong electrical pulses. This lets you control the motor’s position and speed very well.
Using a stepper motor driver stops problems like too much electricity, shaky movement, and motor damage. It helps the motor work well and last longer.
Microstepping drivers make the motor move smoother and quieter. They are great for projects that need very accurate movement.
Picking the right stepper motor driver means matching the voltage and current to your motor. This keeps the motor working safely and at its best.
Good wiring and setup are very important for your project. Always check your connections and avoid mistakes to keep your system working right.
What is a stepper motor driver
Definition and main function
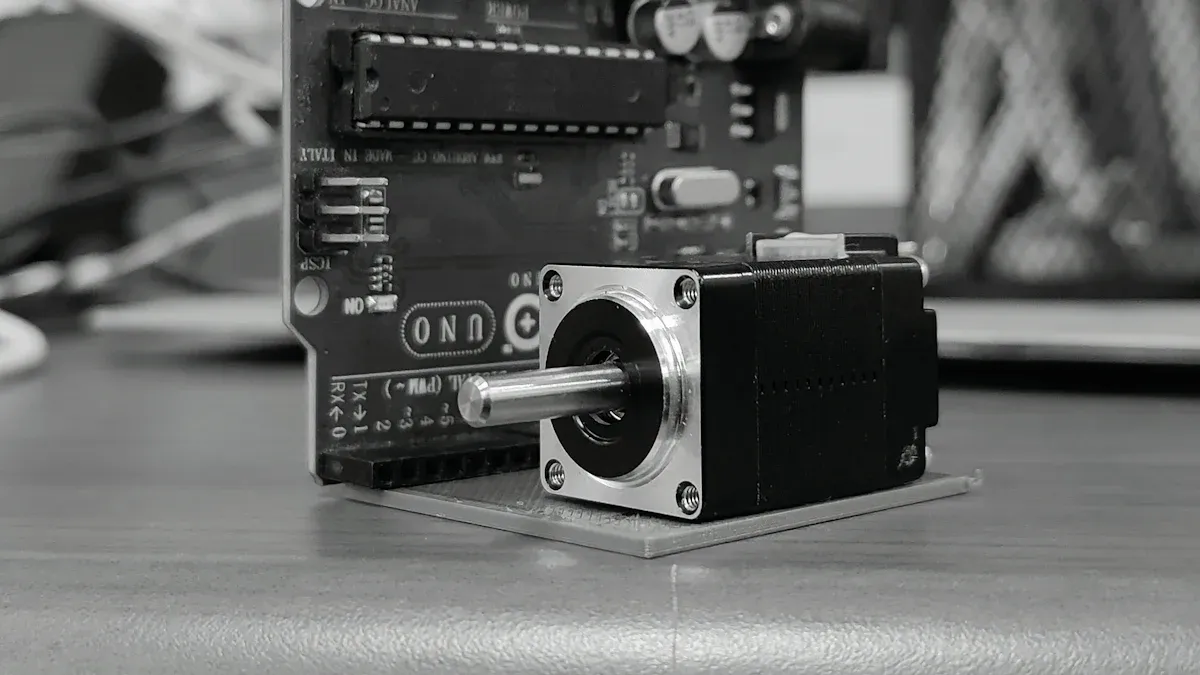
A stepper motor driver is a device that helps control a stepper motor. It sends power and timing signals to the motor. This makes the motor move in small, exact steps. The driver connects your control system, like a microcontroller or computer, to the motor. It takes simple digital signals and changes them into electrical pulses. These pulses make the motor turn a certain amount each time.
The main job of a stepper motor driver is to change digital signals into electrical signals for the motor’s coils. This lets you control the motor’s position and speed very well. You can use a stepper motor driver in things like 3D printers, robots, and machines that work by themselves. The driver uses special circuits, such as H-bridges, to control how much current goes through the motor and which way it flows.
Tip: A stepper motor driver helps you get smooth and accurate movement without needing extra sensors.
Why it's needed
You need a stepper motor driver because stepper motors cannot connect straight to power. If you try, the motor will not work right. It might shake, make noise, or get too hot. The driver changes weak signals from your controller into strong, timed pulses for the motor. Without this, the motor could break or stop working.
Here are some problems you might have if you do not use a stepper motor driver:
| Risk or Limitation | What Happens |
|---|---|
| Electrical overload on controller | Your controller can break because it cannot handle the motor’s power. |
| Irregular and unstable motion | The motor moves in a jerky or random way. |
| Increased noise and vibration | The motor gets noisy and shakes, which makes it wear out faster. |
| Lack of protection | The motor can break from wiring mistakes or too much voltage. |
| Permanent motor failure | Too much current can destroy the motor forever. |
A stepper motor driver also lets you use special features, like microstepping and torque control. These features help your motor work even better. If you want your project to run smoothly and last longer, always use a stepper motor driver.
How a stepper motor driver works
Pulse control and step sequence
You control a stepper motor driver by sending electrical pulses. Each pulse makes the motor move one step. The driver changes these pulses into digital signals. These signals turn on the motor coils in a certain order. This order is called the step sequence. The step sequence tells the motor how to move. It can go forward, backward, or make tiny steps for better accuracy.
The stepper motor driver uses a DC power supply and special circuits to send the right pulse sequence.
You can change the speed, direction, and smoothness by adjusting the pulse frequency and sequence.
Each pulse is a digital command that makes the motor turn a small, exact amount.
You can pick different step modes like full-step, half-step, or microstepping. These modes change how many steps the motor takes for one full turn. The motor’s speed depends on how fast you send the pulses. Most stepper motors use between 400 and 1000 full steps each second. If the motor has a light load, 700 steps per second works well. You usually start at 400 steps per second so the motor does not miss steps.
Note: The stepper motor driver changes your input pulses into the right coil sequence. This is important for smooth and accurate movement.
H-bridge circuit and current control
Inside the stepper motor driver, there is an H-bridge circuit. This circuit has four switches to control the current in the motor coils. By closing different pairs of switches, you can make the current go forward or backward. This lets you change the direction the motor turns.
| Switches Closed | Current Direction | Motor Operation |
|---|---|---|
| S1, S4 | Forward | Forward Rotation |
| S2, S3 | Reverse | Reverse Rotation |
The H-bridge works like an electronic switch, so you can reverse the current for better control.
The circuit needs protection from voltage spikes, so the driver uses diodes for safety.
Stepper motor drivers use different ways to control and measure the current in the motor windings. One way is stepper motor drivers. Unipolar drivers need a center-tap wire for each coil. Bipolar drivers use one winding per phase and do not need a center tap. The way the circuits are built is not the same. Unipolar drivers use four transistors in a half-bridge setup. Bipolar drivers use eight transistors in two H-bridges, so the circuit is harder to build.
Feature Unipolar Stepper Motor Bipolar Stepper Motor Wiring Arrangement Needs a center-tap wire for each coil No center-tap, just one winding per phase Number of Switches Four transistors in a half-bridge setup Eight transistors in two H-bridges Complexity of Circuit Easier, simple way to control direction Harder, needs current to go both ways Performance Attributes Usually less torque and slower speed Can give more torque and faster speed Cost Often cheaper because it uses fewer parts May cost more because it uses more parts Unipolar drivers are good for voltage drive jobs because they pick a stepper motor driver that fits your motor and project. First, check the voltage and current ratings for both. If the driver does not give enough power, the motor might not work or could break. Look at the highest voltage and the steady current the driver can give. Make sure these numbers match what your motor needs.
Think about these things when you pick a driver:
The speed range you want for your project
How many steps and how exact you need them
The heaviest thing the motor will move
What kind of load you have (friction, inertia, or shock)
How the motor is set up and lined up
The drive type (Chopper or L/R)
The step mode (full, half, or microstepping)
If you need ramps for speeding up or slowing down
How long the motor will run each time
The current for running and holding
The voltage from your power supply
The place where you will use the motor
You should also think about the size, step modes, and if you want features like programming. Price and how fast you can get the driver are important too. If you are not sure, ask an expert or look at your motor’s datasheet.
Tip: Always check the highest current for each phase and the resistance of your motor. This helps you pick the right voltage for your driver.
Basic wiring steps
Wiring your stepper motor driver is easy if you do each step right:
Make sure your motor and harness work together.
Check the color codes on your motor’s wires.
Connect the wires to the driver’s terminals. For bipolar motors, use A, A-, B, and B-.
Keep your wires neat and tight. Use strain relief so cables do not come loose. Keep power and signal wires apart to stop electrical noise. Shielded cables help block interference.
Here are mistakes you should not make:
Loose cables or messy wires
Not using strain relief
Not checking wires in places that shake a lot
Mixing up power and signal wires
Not setting the right current on the driver
Note: Good wiring keeps your system safe and working well.
Operation and troubleshooting
After you finish wiring, test everything before you start your project. Follow these steps:
Step Procedure Notes 1 Check all wiring and make sure it is tight. Stops the motor from not working. 2 Make sure all connections between the motor, driver, and controller are good. Stops random or weird movement. 3 Follow rules for electrical setup to lower noise. Keeps your system working right. 4 Be careful when handling the system. High voltage can hurt you. If you have problems, try these ideas:
Update your firmware to fix problems.
Test timing settings to fit your motor.
Calibrate the system for the right steps.
Check your power supply and grounding.
Use tools to check commands.
Look at cables and connectors often.
Keep the driver cool so it does not overheat.
If you follow these steps, you can fix most problems fast and keep your project working well.
Now you can set up and use your stepper motor driver without worry. For the best results, pay attention to small details and check things often. If you need help, ask a pro or join a group for advice.
Now you know a stepper motor driver turns weak signals into strong, timed pulses for your motor. This device lets you control the motor exactly. It keeps the motor safe and helps your projects work well.
It controls current so the motor has steady torque and does not get too hot.
Microstepping helps the motor move smoother and makes less noise.
Protection features make sure your system works well.
When you use these drivers, your machines can move very accurately. Try these tips in your next project to get the best results.
FAQ
What happens if you connect a stepper motor without a driver?
If you connect a stepper motor directly to power, you risk damaging the motor. The movement will be rough, noisy, and unpredictable. You need a driver to control steps and protect your equipment.
Can you use any stepper motor driver with any stepper motor?
You must match the driver’s voltage and current ratings to your motor. If you use the wrong driver, your motor may not work or could break. Always check your motor’s datasheet before choosing a driver.
How do you know if your stepper motor driver is working correctly?
You see smooth, accurate movement when your driver works well. The motor responds to your commands without skipping steps or making loud noises. If you notice problems, check wiring and settings first.
Why should you consider microstepping for your project?
Microstepping gives you smoother motion and quieter operation. You get more precise control over position. If your project needs high accuracy or less vibration, microstepping is a smart choice.
What should you do if your stepper motor overheats?
Turn off the power and let the motor cool down. Check your driver’s current settings and make sure they match your motor’s limits. You can also improve ventilation or add a cooling fan.